
You see them every day. You create them without giving the process a second thought. You may even work with them. But could you honestly answer the question, “What is a digital photo?” How does a computer take a bunch of ones and zeros and turn them into the online images we scroll through daily? What are the different types of images? And what makes one image look better than another? These questions aren’t just fun esoterica; their answers can ensure we produce the best versions of our digital images, whether we’re editing a picture in our phone’s camera roll or scanning old film photos. Read on to learn how.
Read our guide, Everything You Need to Know to Digitize Photos, to learn the benefits of digitization, what kind of scanner you need, and how to use it.
What is digital imaging?
Digital imaging is the process of creating a digital image, with digital photographs being the most familiar example. Digital cameras use a sensor that absorbs light, turns it into digital information, and then allows a computer to recreate that information into an image. Another example of digital imaging would be sonographs, which measure how soundwaves bounce off surfaces and then turn them into bits for a computer to interpret as, say, an ultrasound.
So then, what is a digital photo or digital image?
A digital photo is a computer file composed of individual picture elements (pixels). These pixels are generally rendered as tiny squares of color that, when arranged correctly by a computer, produce a cohesive image. The process is similar to pointillism — each dot in the image provides one small bit of color, but all of the dots add up to a single whole.
Image Quality Parameters
The quality of a digital image is typically measured along two axes: color depth and resolution.
Color Depth
The simplest possible digital image would have a color depth of one bit. Each pixel in the image gets only one bit of data: a zero for black or a one for white. That’s all Russell A. Kirsch had in 1957, when he created the first image ever to be scanned, stored, and recreated in digital pixels. If we increase the bit depth to two bits per pixel, we suddenly have four possible combinations: 00, 01, 10, and 11. Each combination represents a different degree of intensity, so 00 would be black — no light at all — while 01 and 10 would be different shades of gray and 11 would be white. Over time, bit depth has continued to scale up, and each additional bit of depth adds an exponential number of shades. Most black-and-white (technically grayscale) digital images now have an 8-bit color depth, allowing for 256 shades of gray.
It’s important to note that higher bit depth only increases the number of hues for a single color. It does not expand the range of available colors. For that, digital images must introduce additional channels.
Today, the most common color channel scheme is red, green, and blue (RGB). At 1-bit depth, each color is either on or off. This system already allows for eight colors: red, green, and blue, of course, but also black (all three off), white (all three on), and the following combinations:
-
Red + Green = Yellow
-
Green + Blue = Magenta
-
Red + Blue = Cyan
When we increase each channel’s bit depth to eight, for a total of 24 bits, we unlock around 16 million possible colors. 24-bit color, or true color, is the standard color depth for digital images. Although the human eye can only see about 1 million distinct colors, computers don’t evenly distribute their 16 million color options across the spectrum of human perception, so we can still occasionally see uneven gradients in 24-bit images. Some cameras, scanners, and photo editing software work in even higher bit depths to preserve as much detail as possible, but doing so takes up more storage space and requires more computing power.
Resolution
We use pixels to measure the size of an image by length and height. The more pixels in an image, the higher its resolution, and typically the finer its level of detail. One megapixel is worth 1 million pixels and is the standard measure of resolution. Kirsch’s picture of his baby measured 176x176 pixels — less than a single megapixel. Today's standard HD image would measure 1920x1080 pixels or around 2.1 megapixels. In practice, that means you can zoom in more closely on a high-resolution image before details begin to blur and individual pixels become perceptible. It’s like standing too close to a pointillist painting; the image dissolves into a mess of dots rather than maintaining its coherent whole.
Resolution also affects the printing of a digital image. Higher-resolution images have more pixels per inch, so they can be printed at larger sizes before they lose detail.
Resolution is not exactly the same as image size. For example, a digital photo taken at a resolution of 852x480 contains 408,960 pixels. If it’s digitally stretched to 1920x1080, each pixel must stretch to meet that new size. The resolution hasn’t changed, but the size of the image has. Therefore the pixels are less dense, and the image appears blurry and ill-defined, especially when zooming in.
What are the benefits of digitizing your photos?
So, what are digital photos good for? From convenience to security, there are plenty of practical reasons to digitize your photos. For film photography hobbyists or those who have accumulated a lifetime of photographed memories, storage can become a serious space concern. Keeping all those physical photos organized and accessible is a chore, and unless you invest in a climate-controlled vault, they’re vulnerable to fading, folding, fire, flooding, and plenty of other potential mishaps.
Taking the time to digitize your photos obviates all of these concerns. Thousands of digital photos can be kept on a single storage drive, and an all-but-limitless number can live in the cloud, making their physical space demands effectively nil. Once stored digitally, photos can be organized by any scheme you can think of — by photographer, by event, by date, you name it — and tagging systems let you attach specific data points to each one. That means you can tag all the photos in which one person appears, and then when you search for that person’s name, all those photos will appear in the results.
Easy access makes sharing fast, too. Digital photos can be shared instantly over the internet, either with far-away loved ones or with everyone in the living room, so no one’s jockeying for a closer look at the same photo album. Finally, digital photos never degrade in quality, can be backed up easily in case of drive failures, and are insulated from disaster through cloud storage.
Different Image Types: Raster vs Vector
Raster images
Raster (or bitmap) images are the most common type of image in use today. A raster image consists of a rectangular, 2D grid of pixels wherein each pixel is stored in order of appearance on-screen. This makes a raster simple to create and great for fine-tuning the color of each individual pixel, which in turn allows for highly detailed images.
On the other hand, raster files lose definition when resized because their pixel density is preset. They can’t generate new pixels to fill the gaps, leading to blurry images. They’re often large files because of their capacity for detail, but compression can mitigate that shortcoming with some loss of clarity.
Raster images are well suited to digital photography and photo editing. Most of the image file types you’ll see online are raster images: PNG, JPEG, and GIF are all raster image formats. Digital cameras often shoot in raw photo files, which are extremely detailed, uncompressed raster images.
Vector images
Vector images require a different answer to the question “What is a digital image?”. They don’t use pixels at all. Instead, they use mathematical equations, lines, and curves on a grid to produce an image with shapes, borders, and fill colors. Their main advantage over raster images is that they can be scaled infinitely in either direction without losing definition. That makes them great for assets such as logos or digital illustrations. Common vector file types include SVG, AI, and PDF (although PDFs can also be saved as raster images).
But this approach has drawbacks. It’s significantly harder to create a vector image with the fine-tuned detail we expect from digital photographs, for example; many more computations must be performed. There’s also less commercially available software that can parse a vector image, sequestering these images to more specialized applications such as Adobe Illustrator.
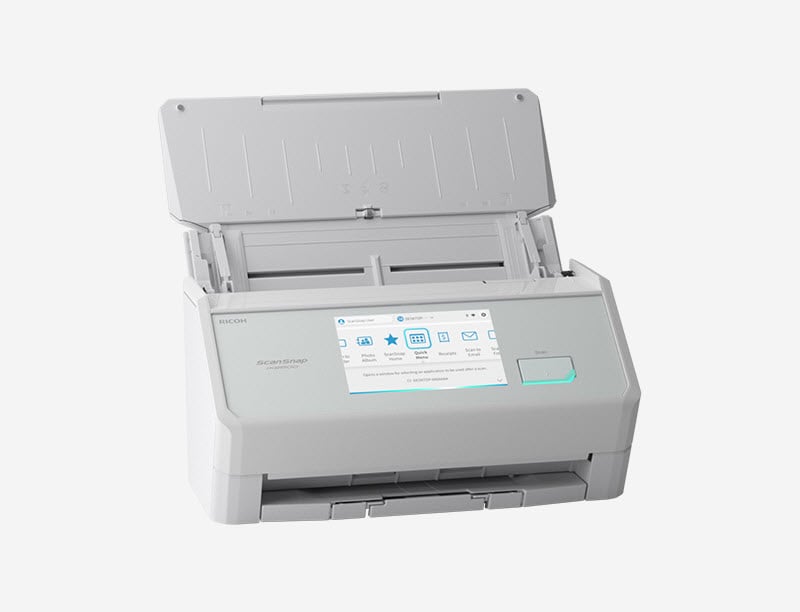
Our recommendation: ScanSnap iX2500
We know you have no shortage of options when it comes to choosing a home photo scanner. We pride ourselves on having spent the last 50+ years designing and developing some of the most beloved electronics in the world, including our line of award-winning, easy-to-use, one-touch ScanSnap scanners.
If you're looking to digitize your collection of photographs, the ScanSnap iX2500 is ready to make the process easy. It uses intelligent image processing to remove red-eye effects and other visual blemishes automatically. It can also scan up to 45 pages per minute straight to the cloud thanks to its automatic document feeder (ADF) and included ScanSnap Cloud software. Click here to learn more and shop the full line of ScanSnap scanners.
Note: Information and external links are provided for your convenience and for educational purposes only, and shall not be construed, or relied upon, as legal or financial advice. PFU America, Inc. makes no representations about the contents, features, or specifications on such third-party sites, software, and/or offerings (collectively “Third-Party Offerings”) and shall not be responsible for any loss or damage that may arise from your use of such Third-Party Offerings. Please consult with a licensed professional regarding your specific situation as regulations may be subject to change.
