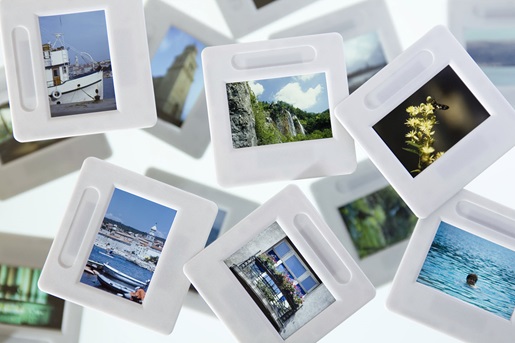
Digitize photo slides and share them with friends and family everywhere, with no slide projector required.
Before online albums made sharing photographs with friends and family near-instantaneous, there was one sure-fire way to show your favorite moments to the ones you love: photographic slides. Even if it’s been a decade or two since the last time you dusted off your slide projector, the memories contained inside each little piece of film are more precious now than ever.If you want to bring those moments from the analog to the digital era, whether to share or simply preserve for your own enjoyment, you’re likely wondering how to scan slides. Your first decision should be whether to send the slides away for professional digitization or to scan them yourself at home, and we’ll walk you through how to choose which may be the right path for you.
Got something else that needs scanning? Check out our comprehensive guide, "How to Scan Just About Anything."
How to have your slides scanned professionally
Numerous mail-in services cater to people who want to know how to scan slides without needing to invest in their own hardware and follow step-by-step instructions. These services typically offer rates based on the number of slides you plan to send in for digitization, with the final files either sent to you for download via a cloud service or on a physical medium such as USB drive or DVD data disc.
Here are a few reasons you may want to opt for professional slide scanning:
- You have a mid-sized slide collection: If your collection of slides spans several dozens to a few hundred, you’ll likely find it more cost-effective to send them away than invest in dedicated hardware; thanks to the proliferation of digital photography, you probably won’t be making more slides to digitize after these ones are taken care of. However, if you already own your own scanner and wish to try scanning your slides yourself, check the next section of this article for more information.
- You want the easiest possible process: Many professional services allow you to simply select the options you want, print out a pre-filled shipping label, affix it to your boxes full of slides, then send them off and wait for the results. While the work of digitizing your own slide collection can be fulfilling, there’s no question that it’s also quite a bit more time-consuming than turning to a professional.
- You want the best quality possible: Photographic slides pack an incredible amount of detail into a tiny space, with small elements that are nearly impossible to observe with the naked eye reappearing once enlarged via a slide projector. Professional slide scanning services use digitization machines with extremely high-resolution sensors that would be otherwise impractical for daily use to capture these details.
Did You Know?:Make sure your printed photos are ready for the future too, with our guide to Photo Scanners: How to Choose the Picture Perfect Machine for Your Needs.
How to scan slides at home
If you want to know how to scan slides to digital formats with your own scanner, you’re in for an ideal weekend project. The process isn’t terribly complicated, but it will require a good amount of time and a small list of materials. Let’s start from the beginning.
Organize your slides
The first step in the process is to get all your slides in one place and determine which order you want to work through them. If your slides weren’t stored in a particularly well organized manner, you can get a quick glance at the contents of each one by holding it up to a moderately bright light and looking closely — a magnifying glass can be helpful for picking out small details. If some slides are duplicates or not very high quality (with blurry images or poor exposures, for instance) you may wish to skip digitizing them.
Clean your slides
Knowing how to scan slides starts with knowing how to restore them. Unless you stored your slides in perfectly clean and dry conditions, they have likely accumulated some dust over the years, and may have even become moldy. The video above presents a handy and quick step-by-step slide cleaning process; in short, you’ll want to wear nitrile or latex gloves to avoid depositing further oil or dust on the slides, then wipe each side of the slide with a fresh cotton swab dipped in at least 98% isopropyl alcohol, then dry each side with compressed air.
Scan your slides
The execution of this step will vary substantially depending on what kind of scanner you are using. Purchasing a scanner purpose-built for digitizing slides can work well and yield a higher-resolution image, though it also likely won’t be of much use once you finish scanning your collection.
You could also try digitizing your slides with a flatbed scanner, but you’re not guaranteed to get good results. Because mounted slides don’t sit flat, they won’t scan as accurately as regular photos. That means you may have to deal with dark, crooked, noisy digital images that require a lot of photo editing to look good. Furthermore, lining up slides on a flatbed scanner can be a time-consuming, error-prone process that you may have to repeat a few times for passable results.
Whichever type of scanner you have, try scanning a test image before you proceed with further slides. Then, open up the digital version of the first slide you scanned and see if it yielded a satisfactory image. If not, adjust the settings and continue to hone your process for how to scan slides until you are pleased with the results.
Did You Know?:ScanSnap Home features automatic image correction, document categorization, and support for multiple devices to help make digitization easy and approachable.
Why scan slides?
While slides used to be an easy way to display photos on a big screen, modern technology has made that process much easier. Digital projectors, computer monitors, smart TVs, and a bevy of other devices make it trivial to share photos on any screen we wish. We can even do so without having to develop those photos first, thanks to the advent of digital photography.
However, old slides still contain invaluable, potentially irreplaceable photos. Furthermore, because of their construction and storage, slides are often in better condition and offer better image quality than contemporaneous photographs. Scanning slides is a way of using current devices to preserve and share important memories. In short, learning how to scan slides can be an important way to preserve family or even cultural memory.
Our recommendation
Although we’ve spent the last 50+ years designing and developing some of the most beloved electronics in the world, including our line of award-winning, easy to use, one touch ScanSnap scanners, slides require such exacting care that we recommend using a professional scanning service.
For your other document needs, however, we proudly suggest the ScanSnap line. Click here to learn more and shop the full line of ScanSnap scanners.


